
“Subtraction” is the name of a class I will be participating in this semester, where we will explore a variety of materials, and tools used for subtracting from those raw materials. Some examples of tools are hand router tools, the laser cutter and the CNC machine.
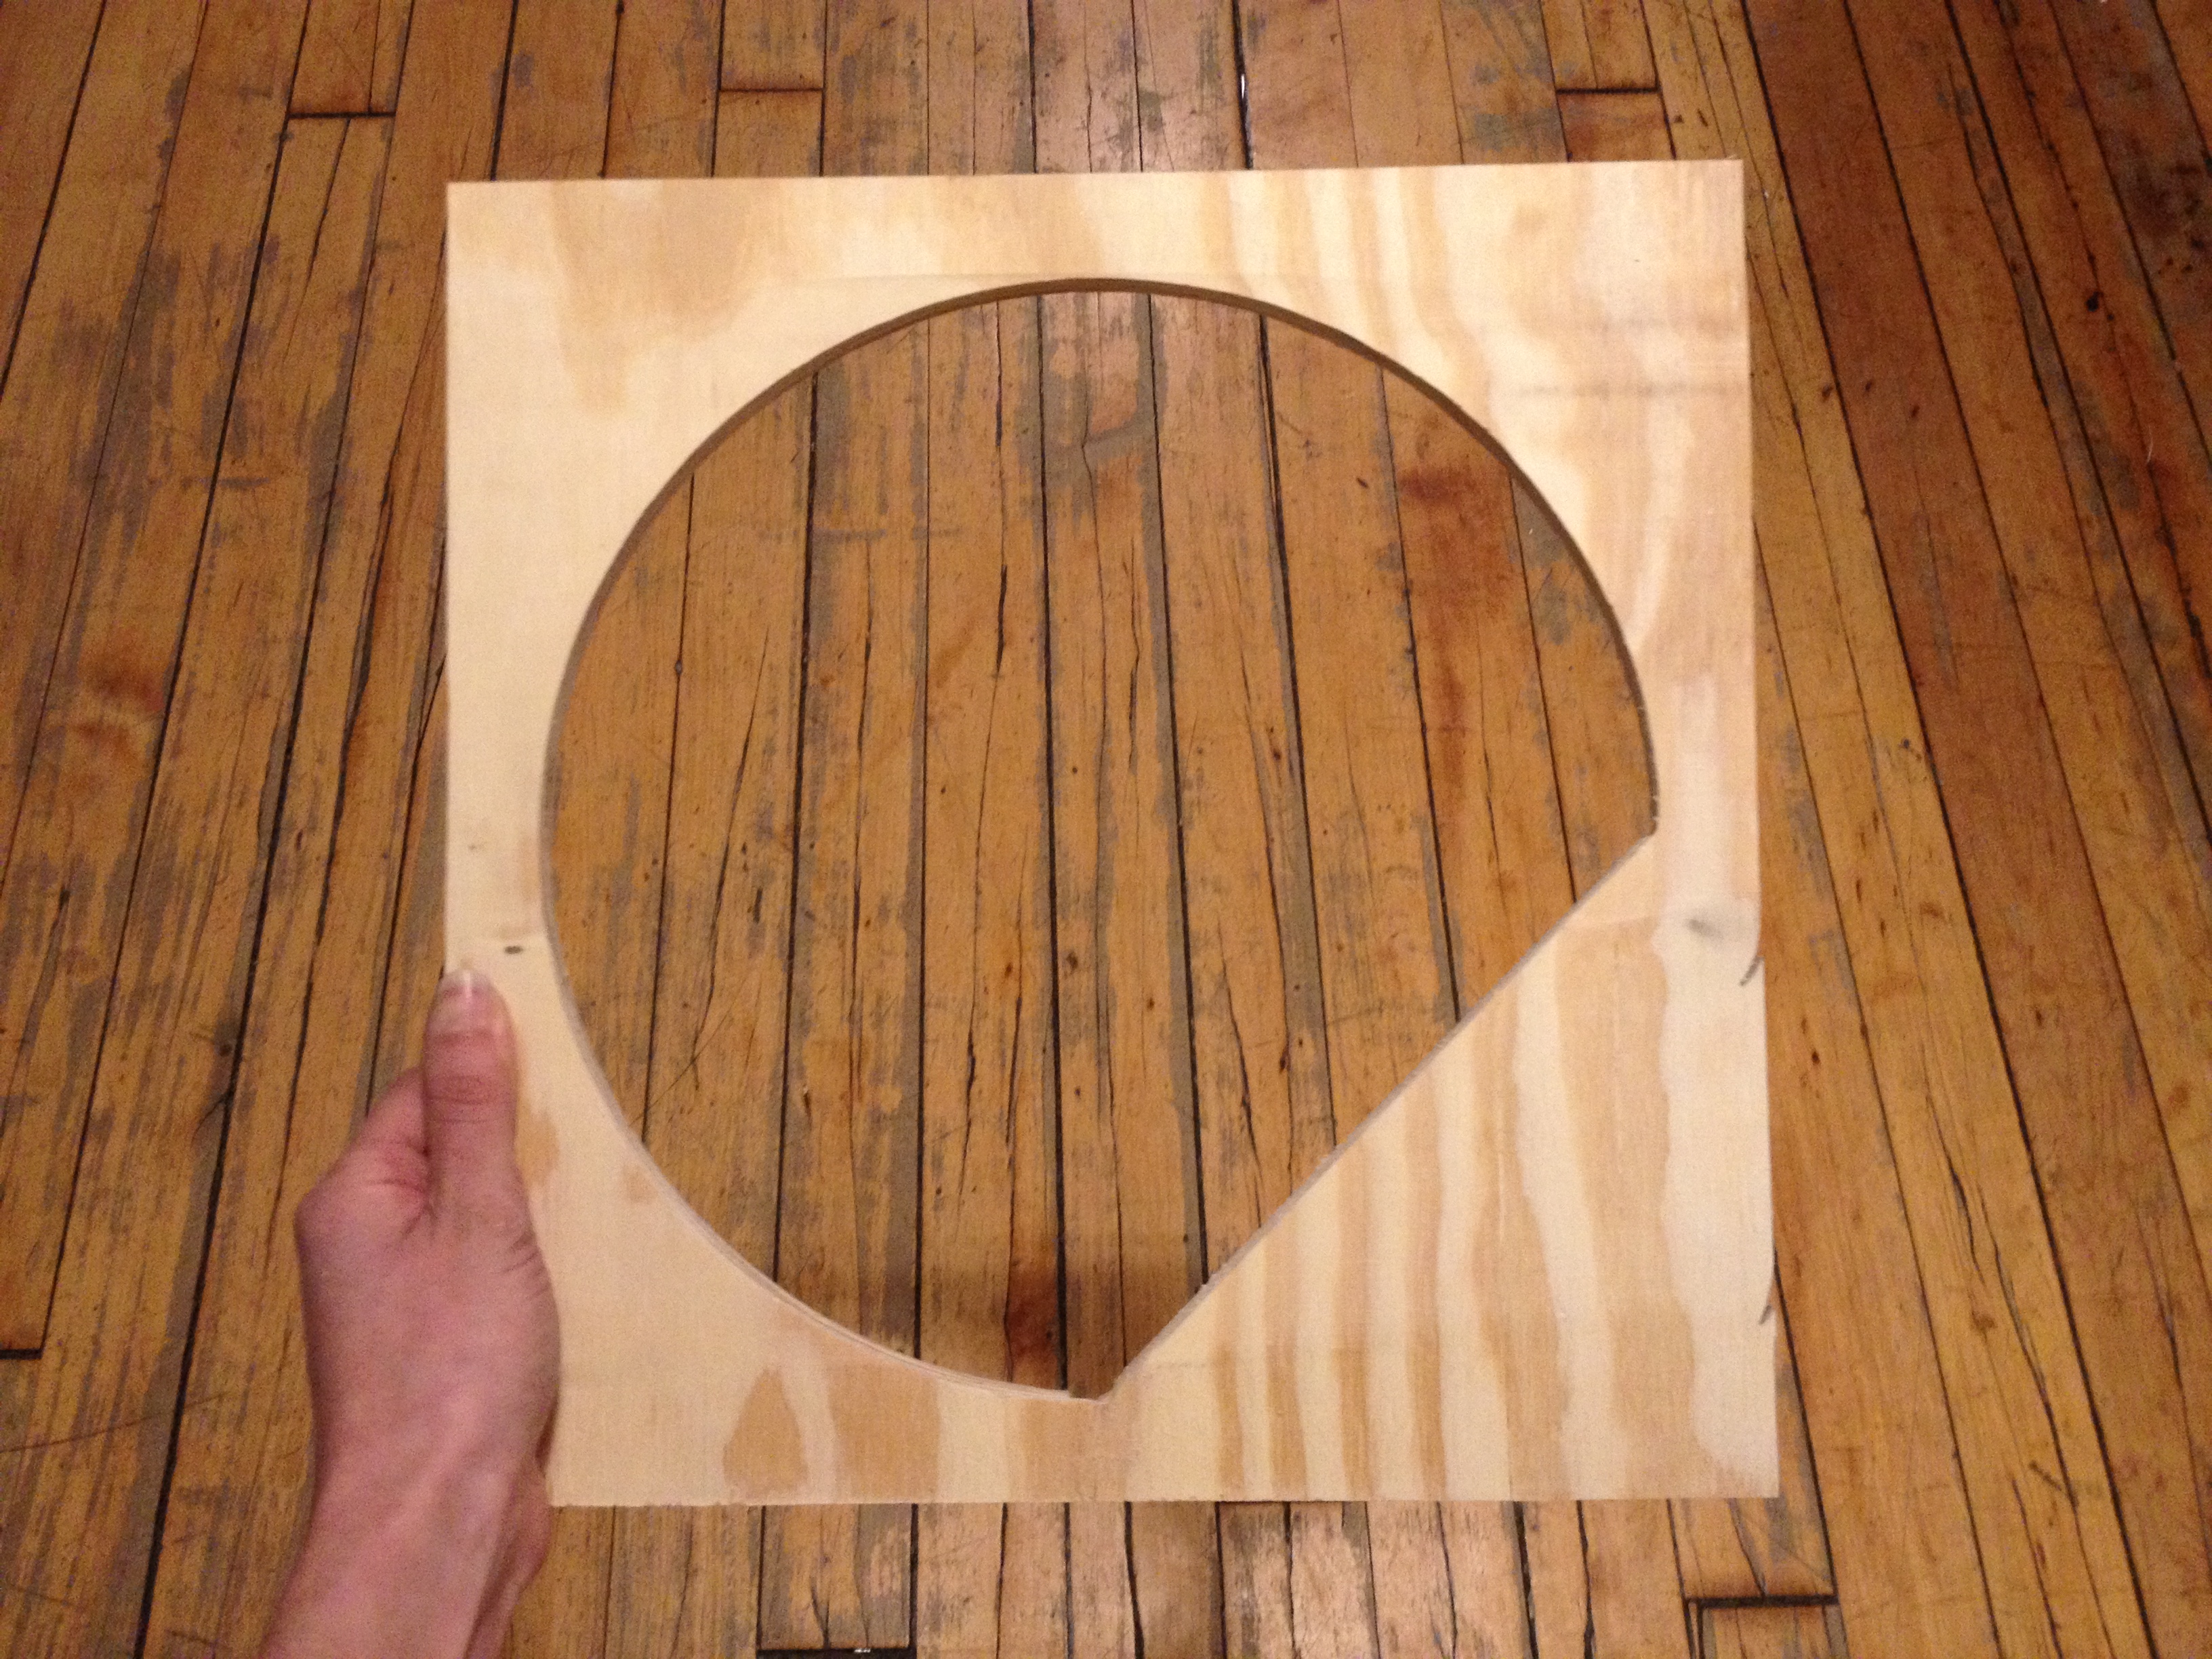
This week, our homework assignment was to create this shape by using the hand router tool.

Look complicated? It’s not! Let’s see how it’s done.
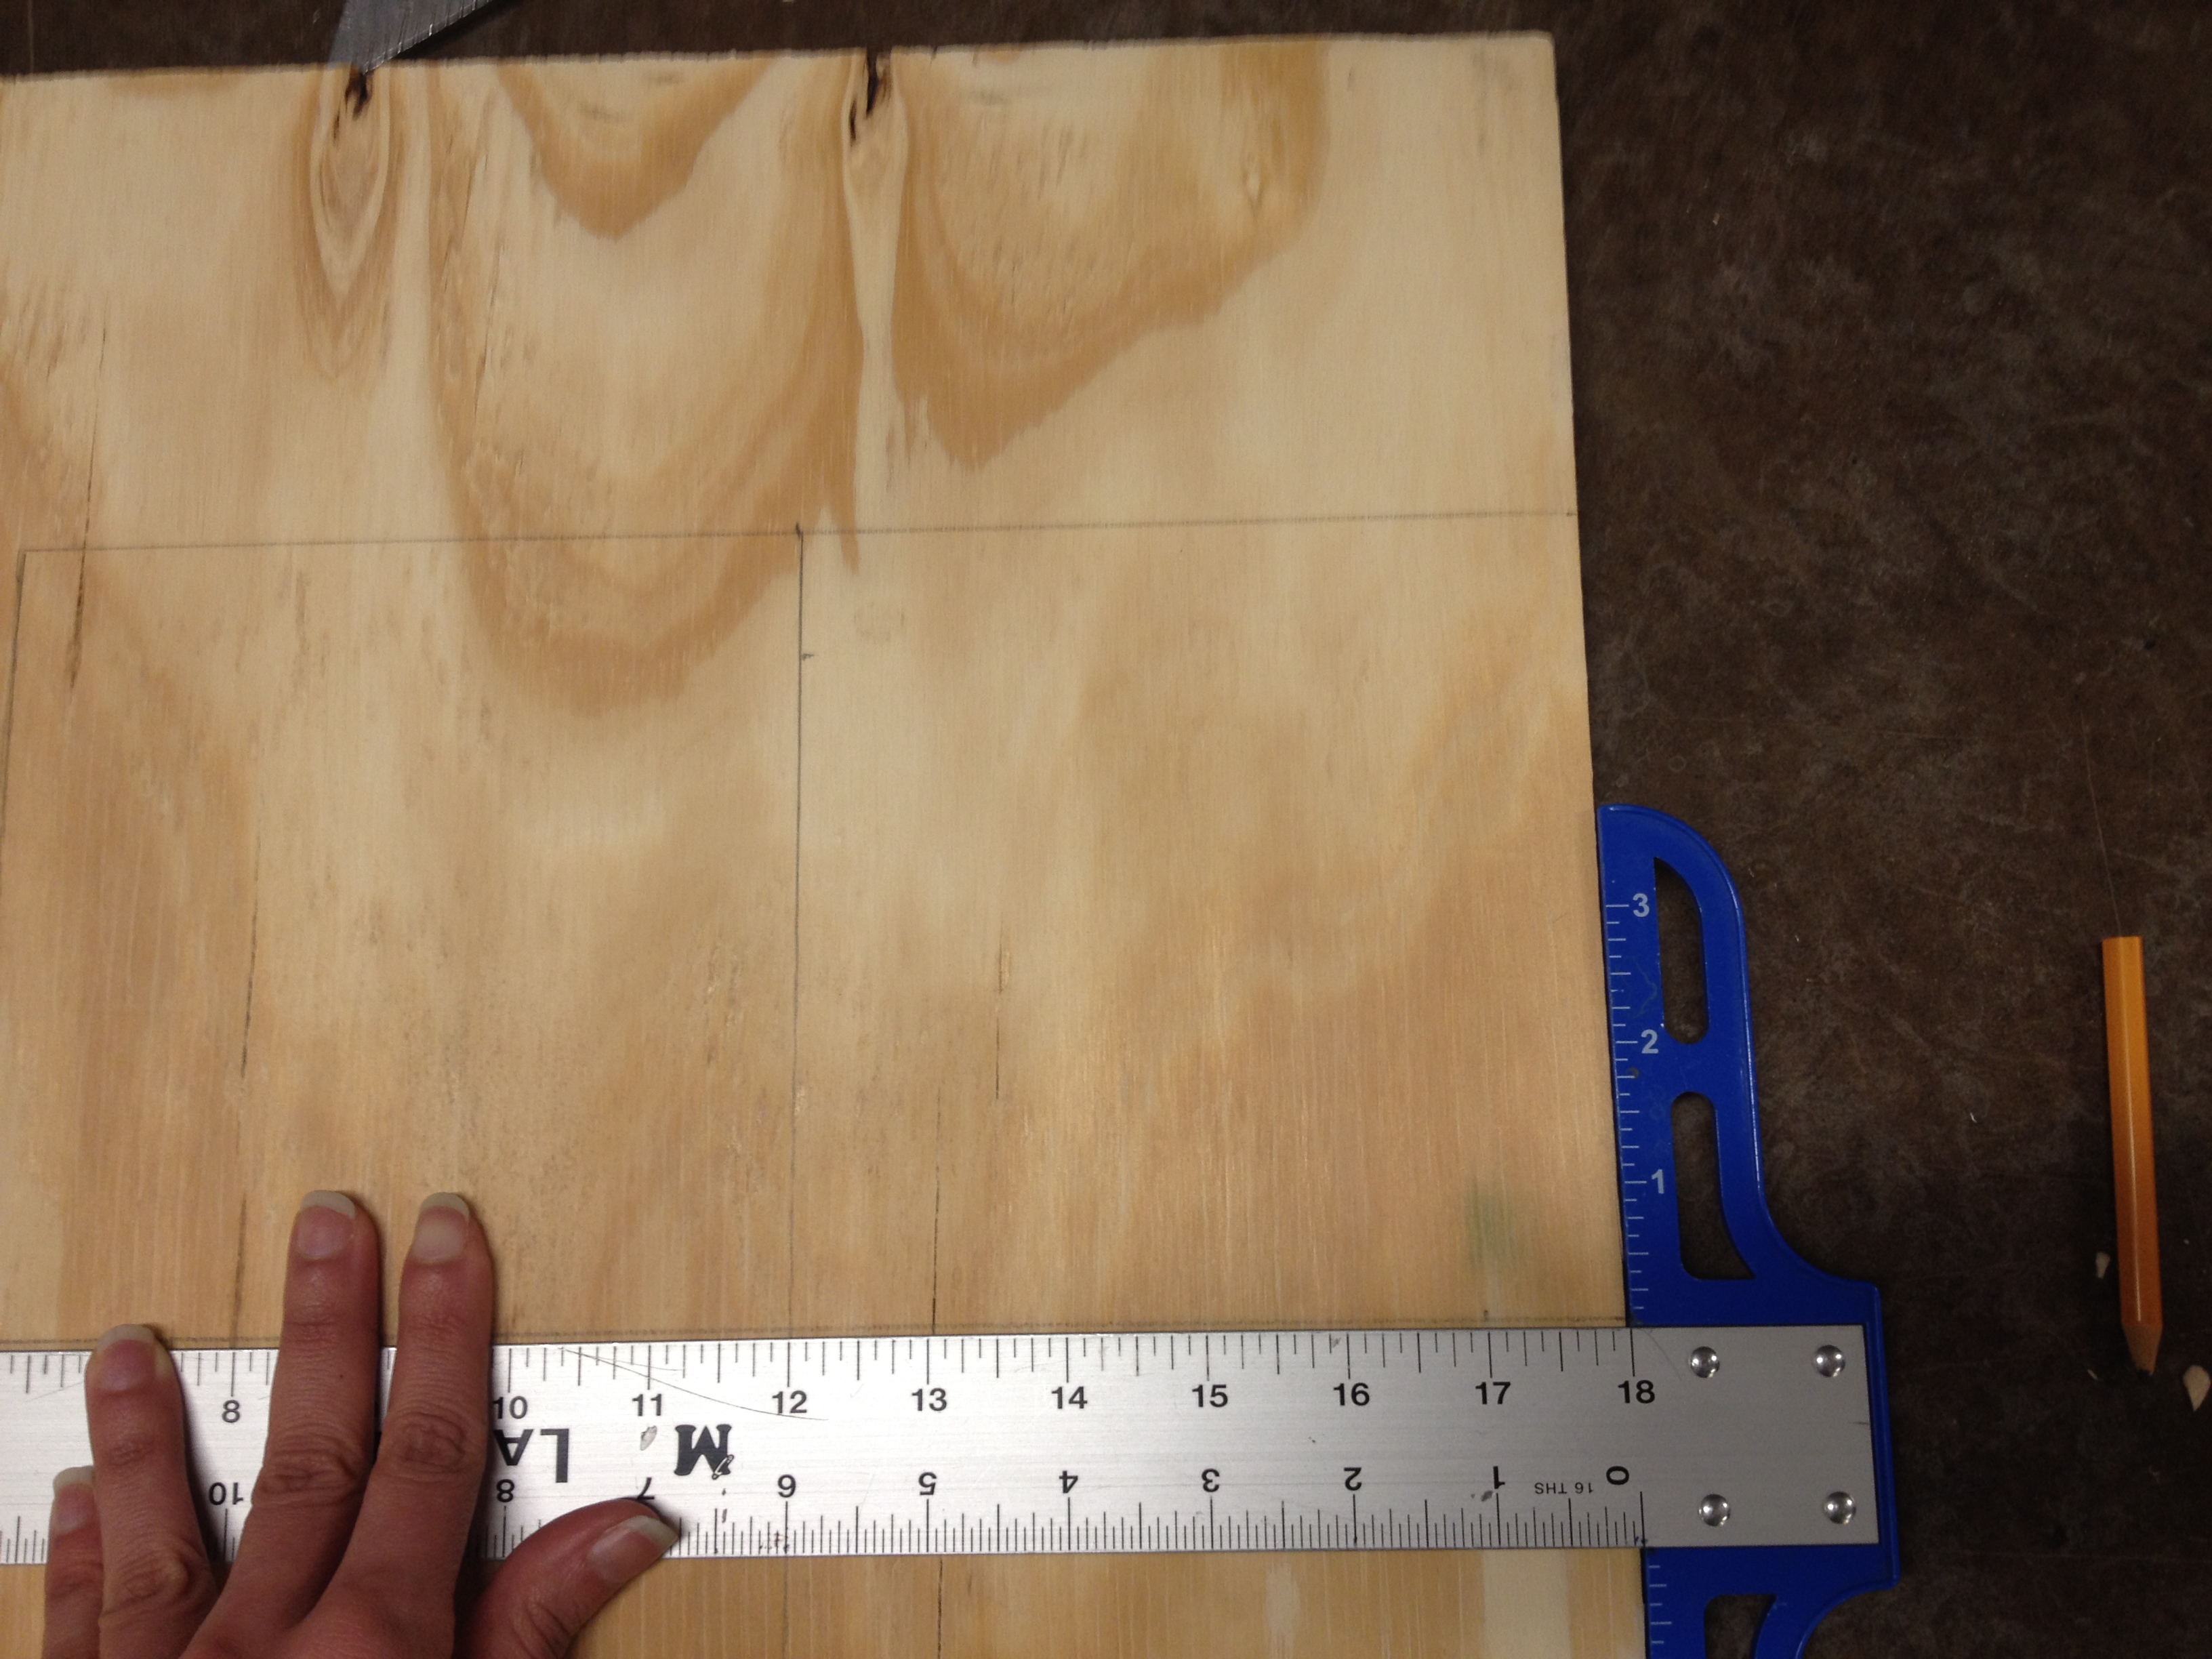
Here’s a pic of the material I used.

This is plywood, it’s not of great quality and it’s pretty cheap, but since this exercise is for familiarizing ourselves with the tools in the shop, plywood is fine.
In order to figure out the angle of the frame, I needed to create a square, and find the center and connect the dots of one inch in of the perpendicular lines.
Once I marked that, I went off the the shop (wood shop, of course).
As I mentioned earlier, for this exercise, we needed to use the hand router tool. The hand router tool has a drill bit at the top, and that drill bit eats away at the material. However, in order for that to happen precisely, it is required to use stencils and sometimes external assets (like rulers for example). In this case, I used a stencil that serves kind of as a compass (for drawing circles). I attached the compass stencil to the head of the router, so that the drill bit now acts the same way a pencil would in a compass.
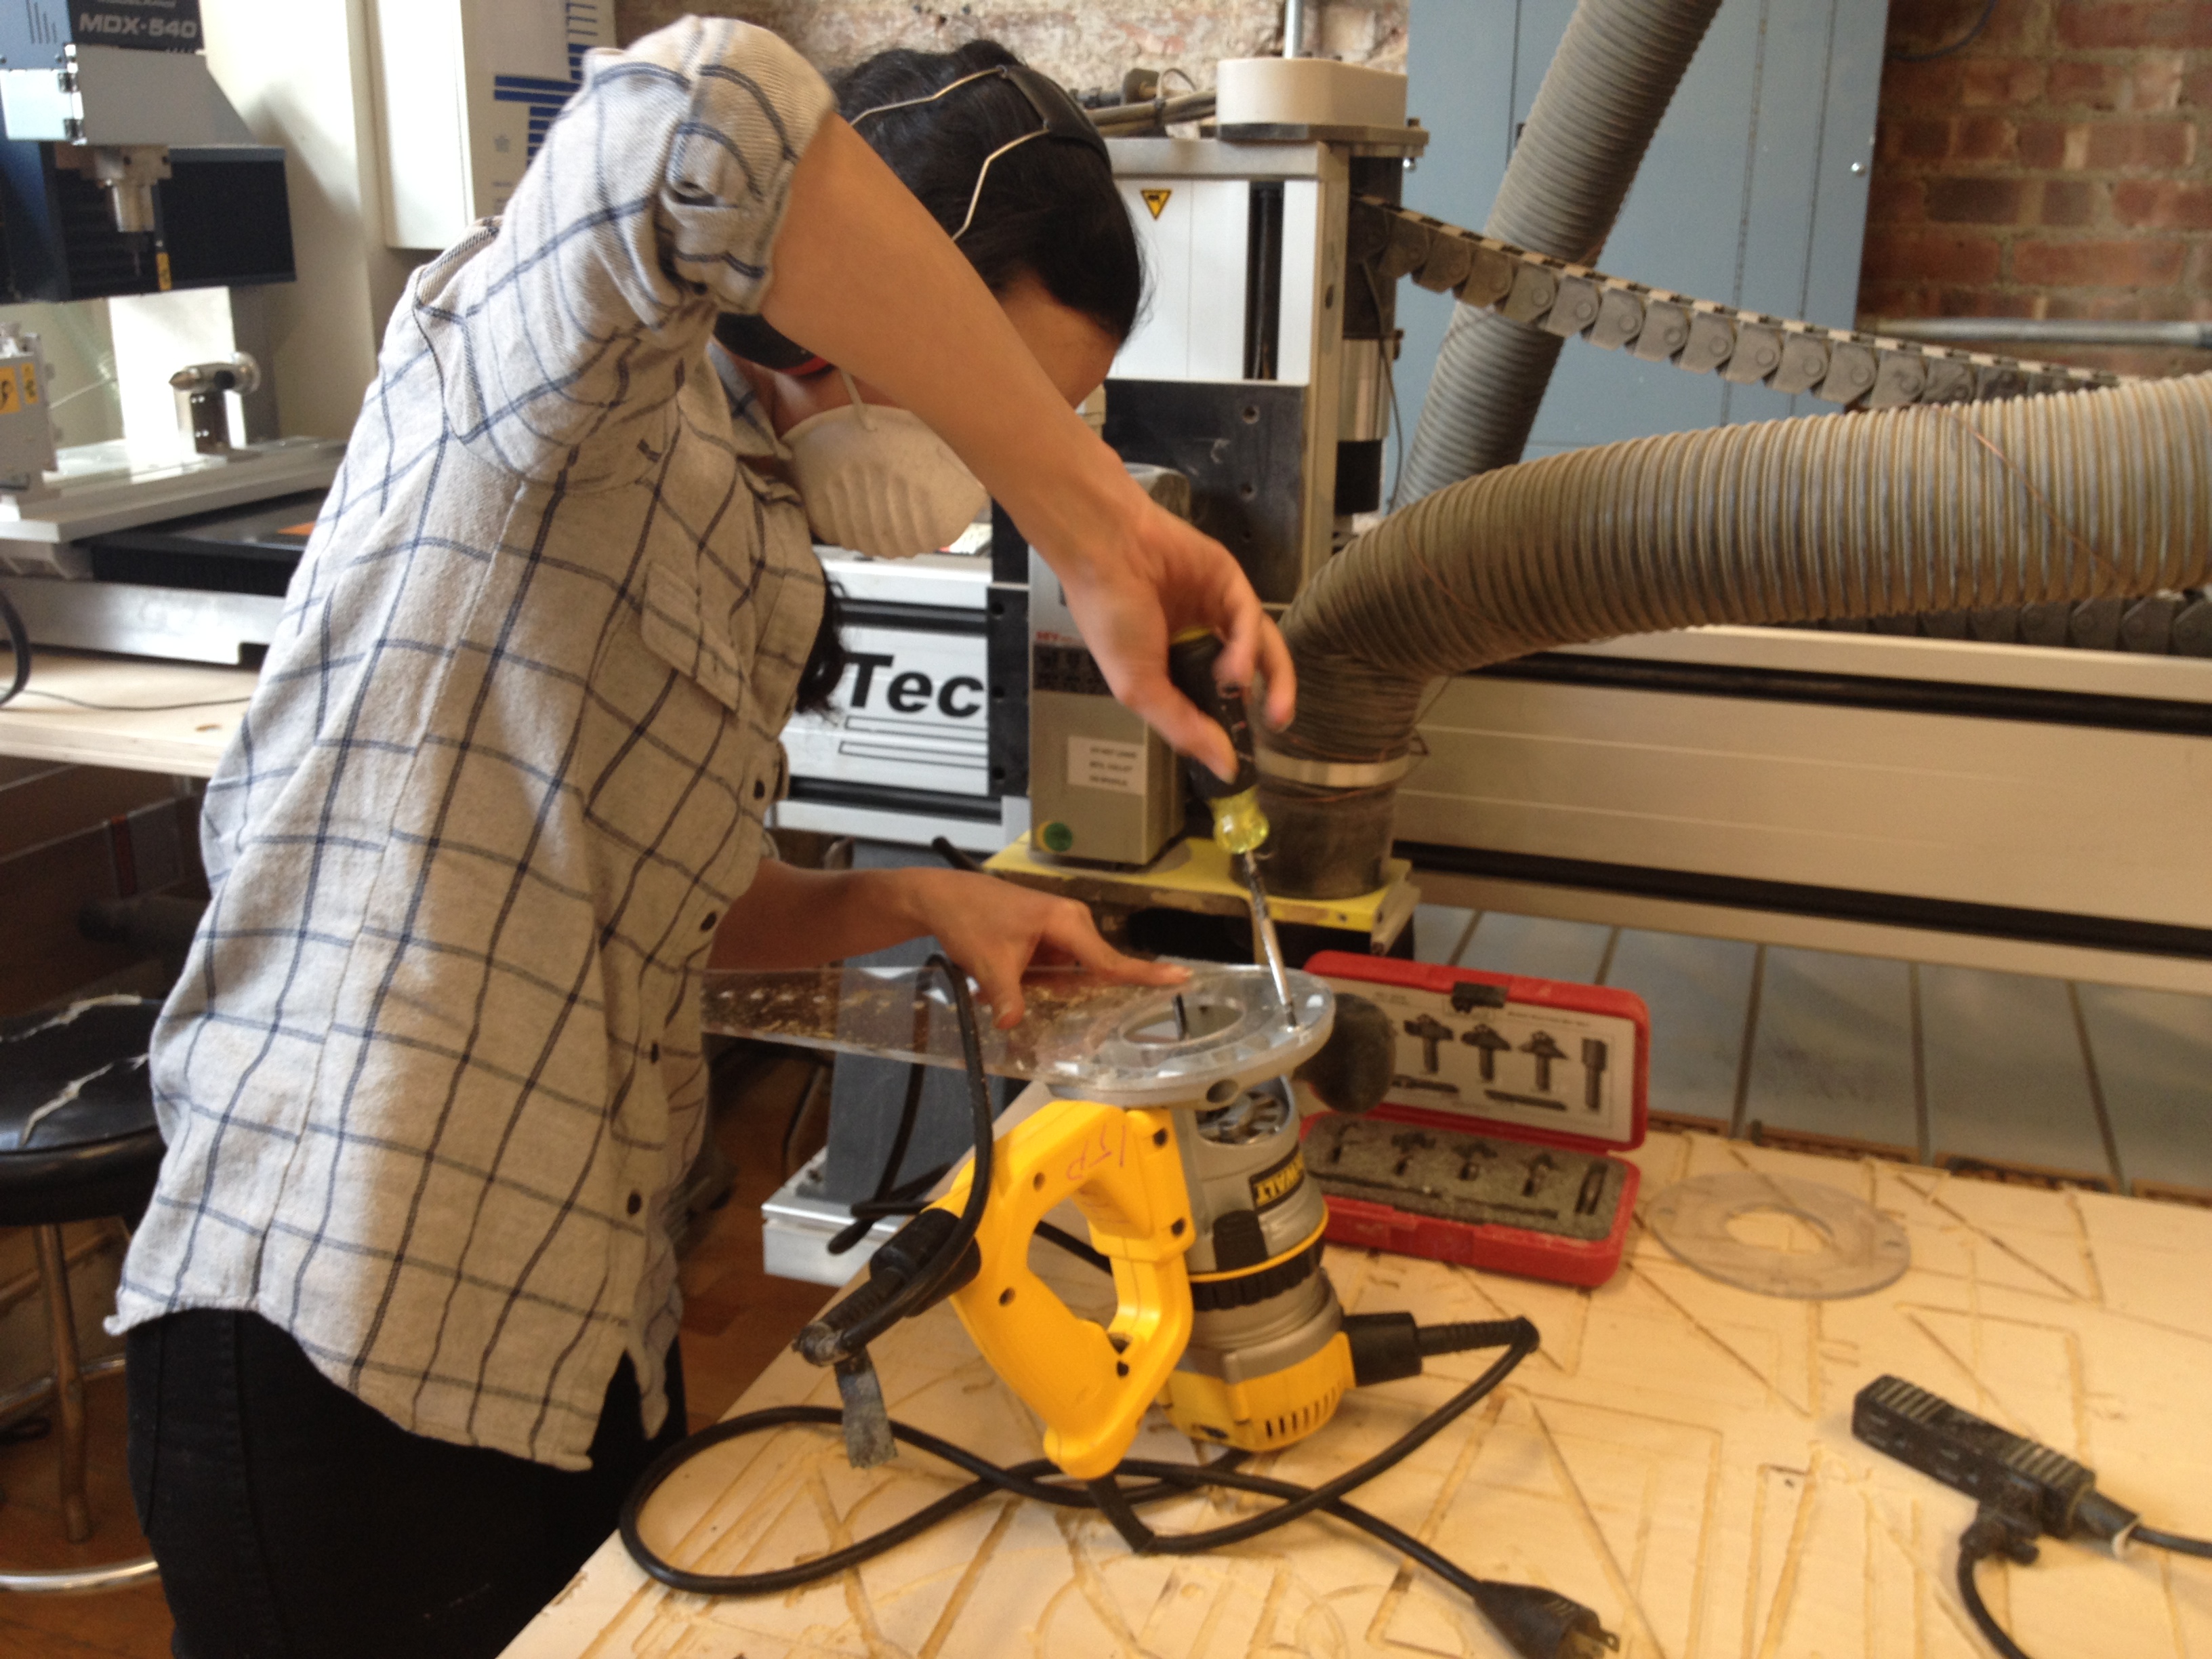
Once that was attached I could carve the 3/4 circle

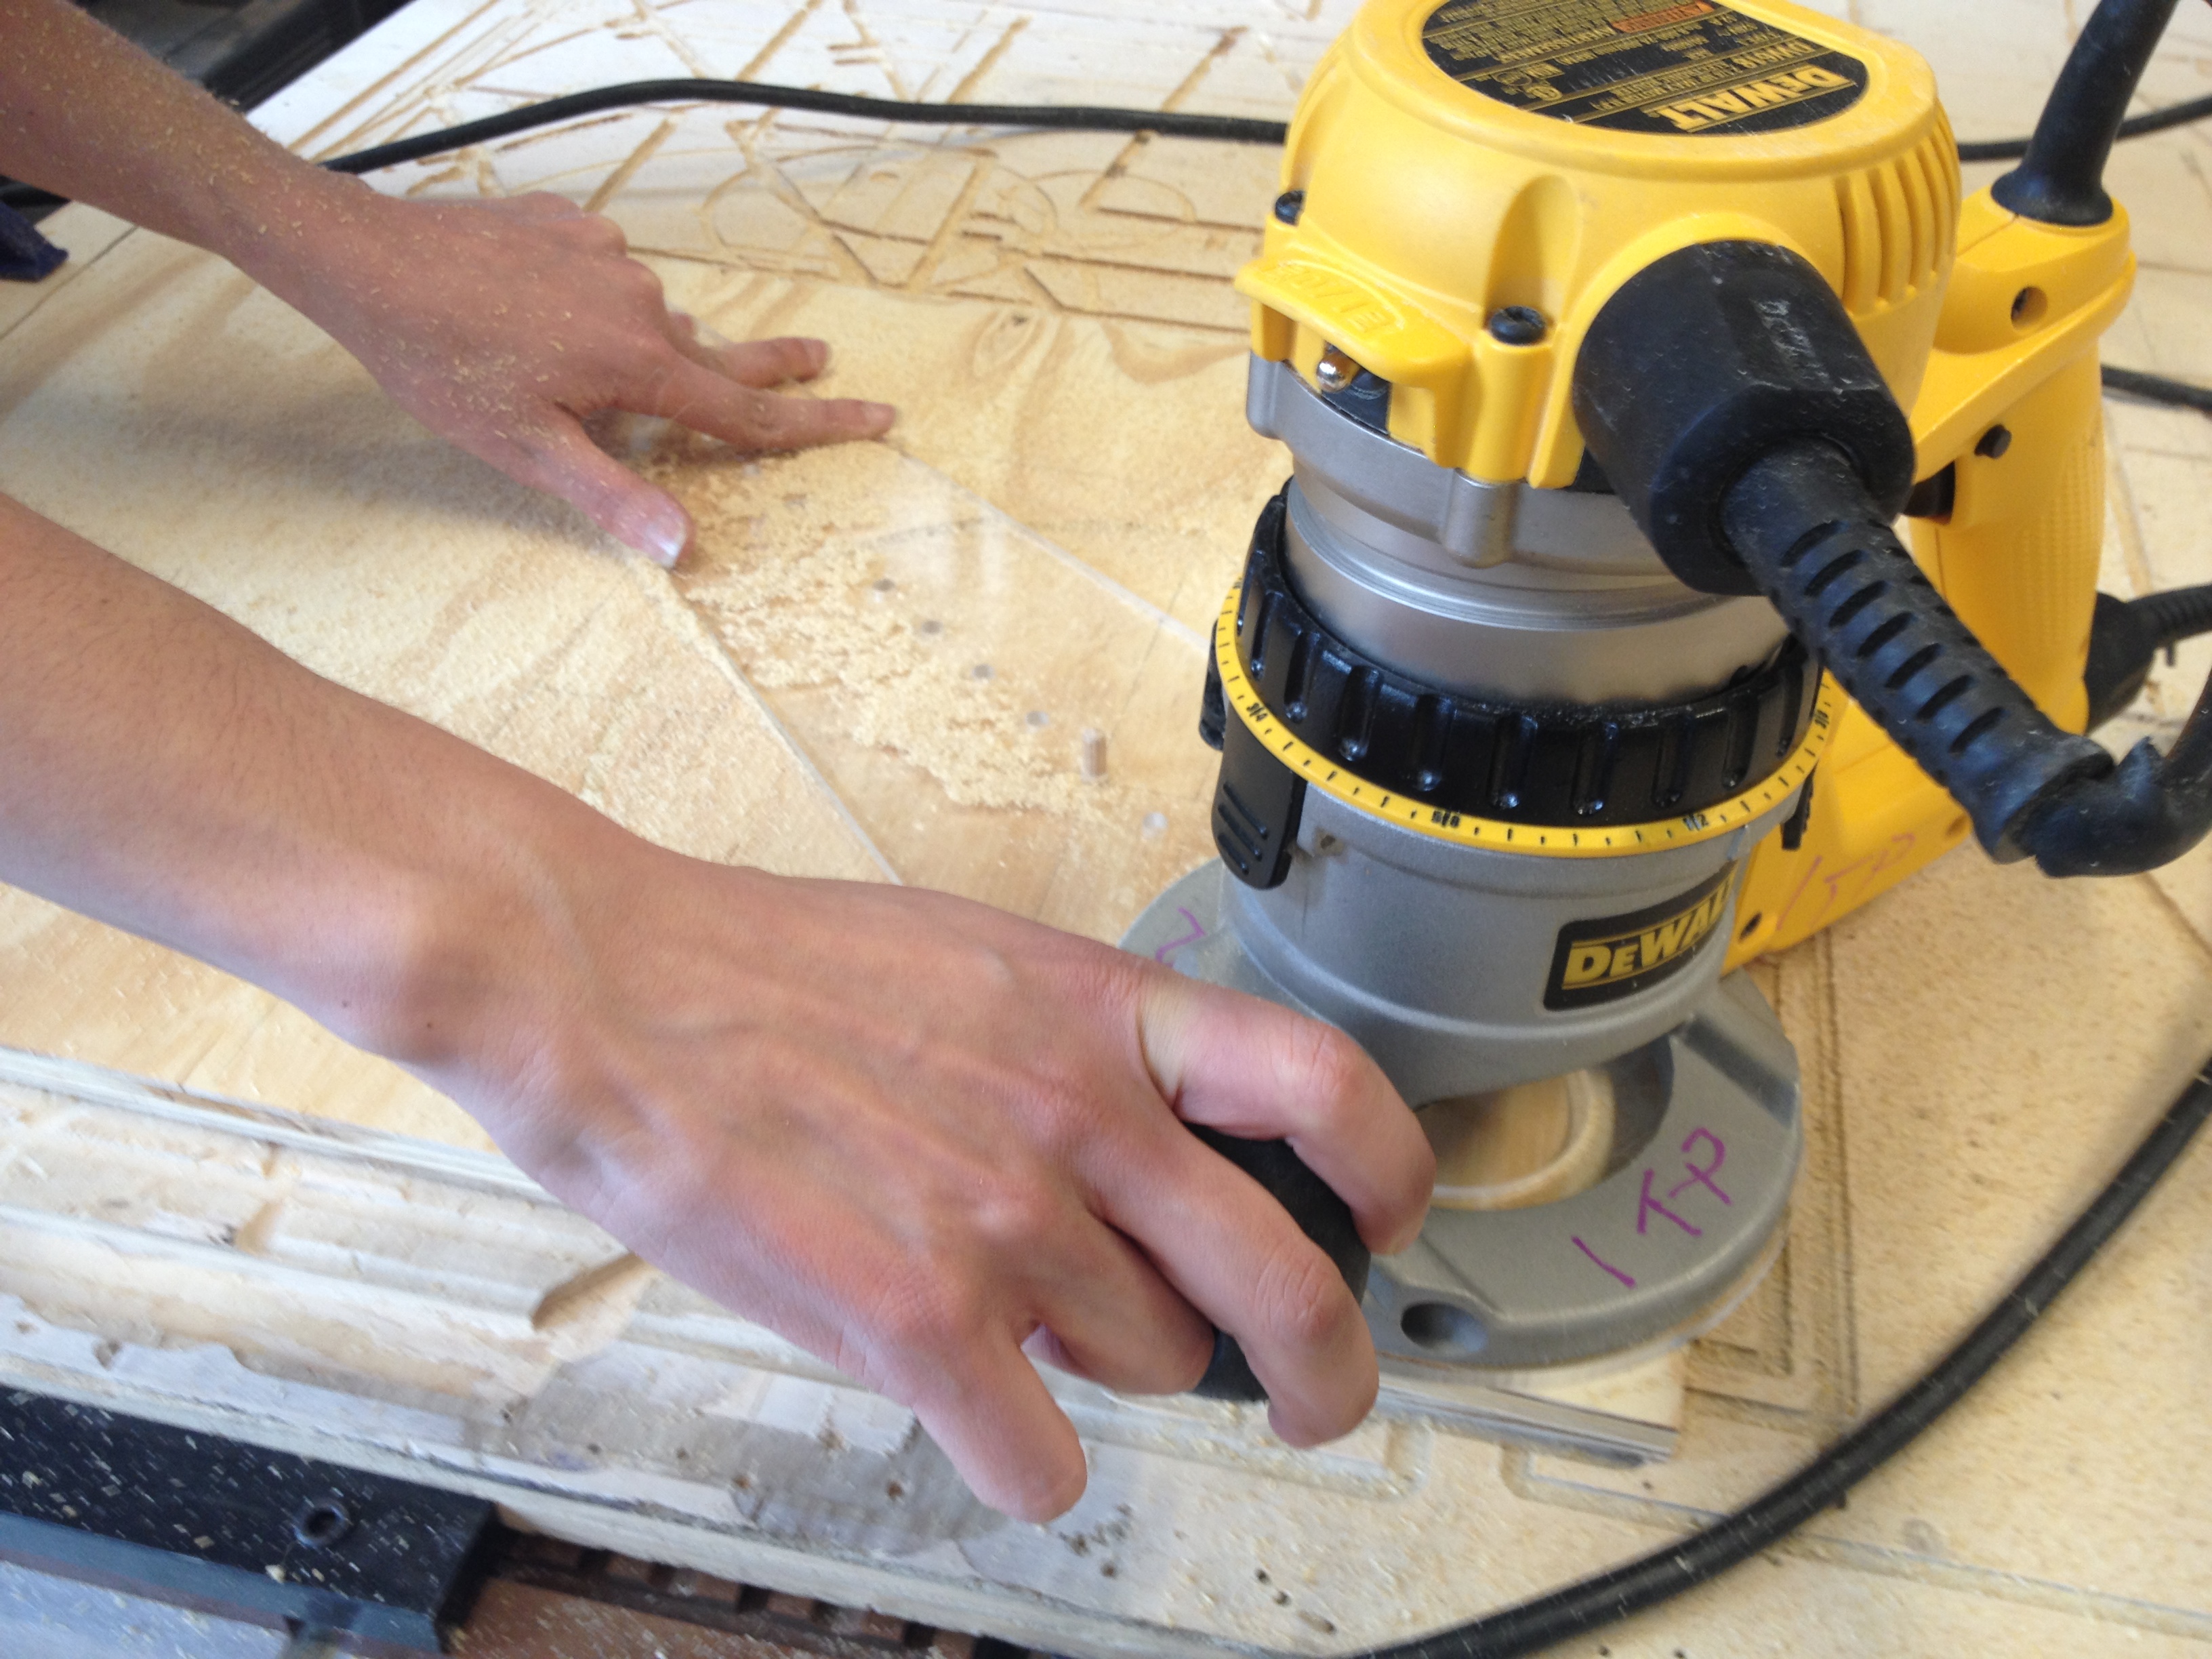
Something important to know about the hand router tool: you don’t want to carve or cut anything in one pass. The best and most precise, most smooth way of carving or cutting, is to make multiple passes over the same path. Essentially when this mean is that after each pass, you lower the drill bit just a little bit in order for it to eat away at slightly more material.
So, back to our project. The next part was to cut that straight line in the remaining quarter of the frame. In order to do that, I needed to measure the radius of the hand router and the diameter of the drill bit in order to figure out where to align my ruler. Once I had that figured out, it was time to get back on the hand router.

And that’s pretty much it! All that was left to do was to cut the sides, and viola! We have our interestingly shaped frame!
1 Comment