Exposure Bracketing

Leave a comment
Digital Imaging

For this exercise, I wanted to experiment with the brightness of the image, resulting in the shutter speed settings. For this I used exposure bracketing, which allowed me to set a range of shutter speed settings and to take three consecutive photos, each being at different settings with out having to manually change the settings in between shootings.

The first image had an average exposure (0), and was in alignment with the aperture settings:

bracketing-med

The second image was shot at a faster shutter speed, so the image was under exposed:

bracketing-dark

The third image was shot at a slower shutter speed, so the image was over exposed:

bracketing-light

Understanding White Balance

Leave a comment
Digital Imaging

In this exercise, I experimented with the white balance features of the camera. After completing this exercise, it became pretty clear that the Auto setting on the camera is probably the most terrible mode you can use to capture good images, even though the definition for the Auto setting is:

“Completely automatic photography; the camera analyzes the scene and tries to choose settings to produce the best results”.

In the first photo, I set my camera on Auto and took a photo. Here’s the result:

dalit-wb-full-auto

You might notice the flash was set off as part of the Auto settings, leading to a flat and awfully bright image.

For the second photo, I turned the setting to Manual, and the white balance to Custom. I placed a grey card in front of the image, pressed half way, removed the grey card and shot the image. Here’s the result:

dalit-wb-manual-wb

When comparing to the original composition, the colors here are pretty accurate.

In the third image I shot, I used the live histogram to view the threshold of brightness in my photo. The initial histogram didn’t show any values in 0 or 255 (at either end of the spectrum), however, the graph was fairly centered and I wanted there to be more rage of greys / brightness. So, in order to do so I slowed the shutterspeed, until the histogram spread upon more values. Here’s the result:

dalit-wb-histogram

Although it’s very subtle, you may notice that this image has a bit more of a yellow tone compared to the previous image. I notice this difference, but I’m not sure of the reasoning behind it.

First 3D Model

Leave a comment
3D Printing

Last semester, I fell in love with digital fabrication. Most of the projects I did revolved around subtracting material (CNC router, laser cutter, lathe, etc.). This semester, I’m stoked to learn about techniques involving more, I guess, addition, which at ITP revolves primarily around 3D printing.

I don’t know too much about 3D just yet, but when I explain it to my mom, I make sure she knows that:

  • I’m not printing holograms
  • The printer doesn’t look like the one we have at home
  • The material that’s being printed on is not paper.

So, what is 3D printing? And why do we even need it? Imagine taking a glue gun and drawing a square with the hot glue. Now imagine creating a new square, a new layer, over the first one. And so forth. The more squares you make, the more height you will create — and that pretty much sums up how 3D printing is done.

What’s it good for? So many things. Ever need an extra button for a shirt? Or a lid for a container? How about making custom-made jewellery?  Or a stopper for your door? Or a clip for your earphones? The possibilities are really endless for this ground-breaking technology.

Before printing though, the object that’s going to be printed need to be designed. The software we will be using is called Rhino. I personally wish it would be more similar and intuitive like Adobe software, but since I’m still learning I’ll give it a chance.

For my first attempt at 3D printing, I’m going to make a tiny pineapple. I started by importing an image of a pineapple to the canvas:

Screen Shot 2015-09-21 at 6.38.53 AM

Then, in a different layer, I traced the roughly traced the profile of the image:

Screen Shot 2015-09-21 at 6.45.24 AM

Once I had the profile, I used a fun-function called “revolve”. You can think of revolve as kind of the 3D version of “rotate”. This function can revolve and profile around an axis you define. I created the axis down the center of the pineapple, and surely enough, it looks like I have created my first 3D model. 🙂

Screen Shot 2015-09-21 at 6.55.55 AM

From Print to Digital

Leave a comment
Project Development Studio

In the previous post, I mentioned having a printed worksheet to accompany the online upload process for book reviews. This week, I would like to present what I have put together and what my thoughts are for moving forward with this idea.

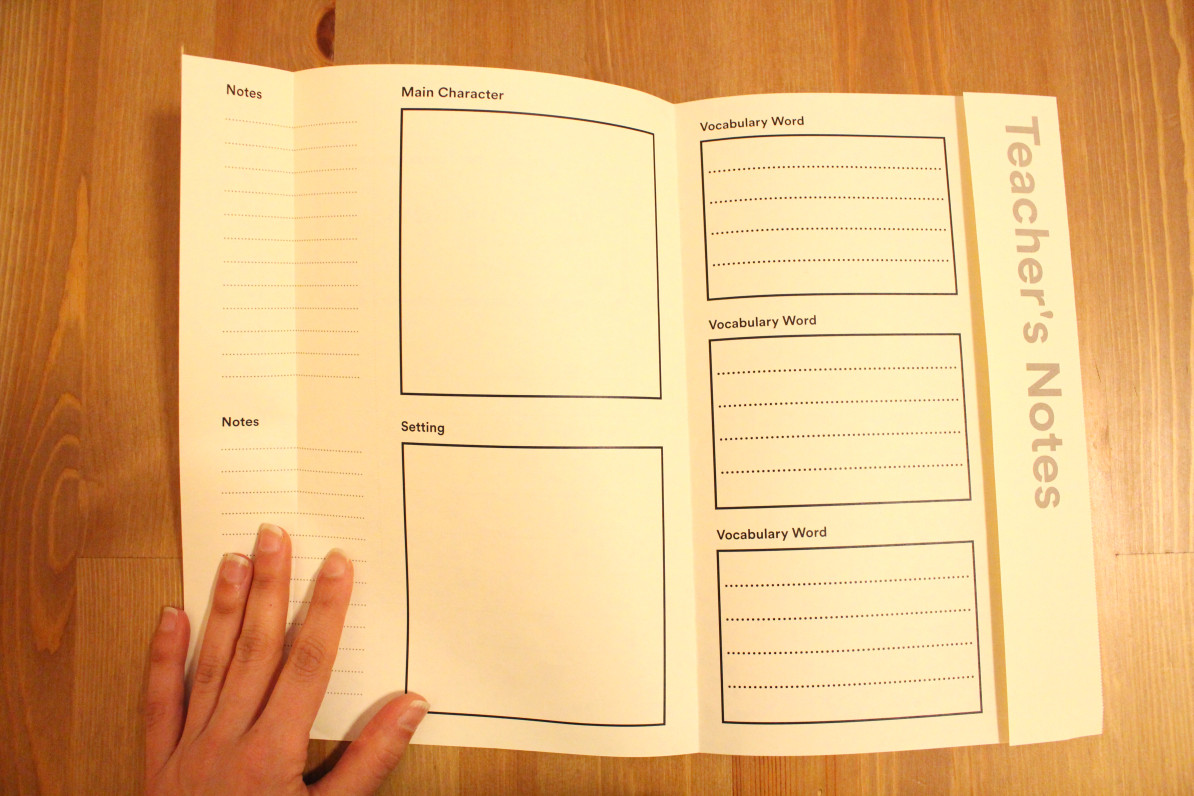
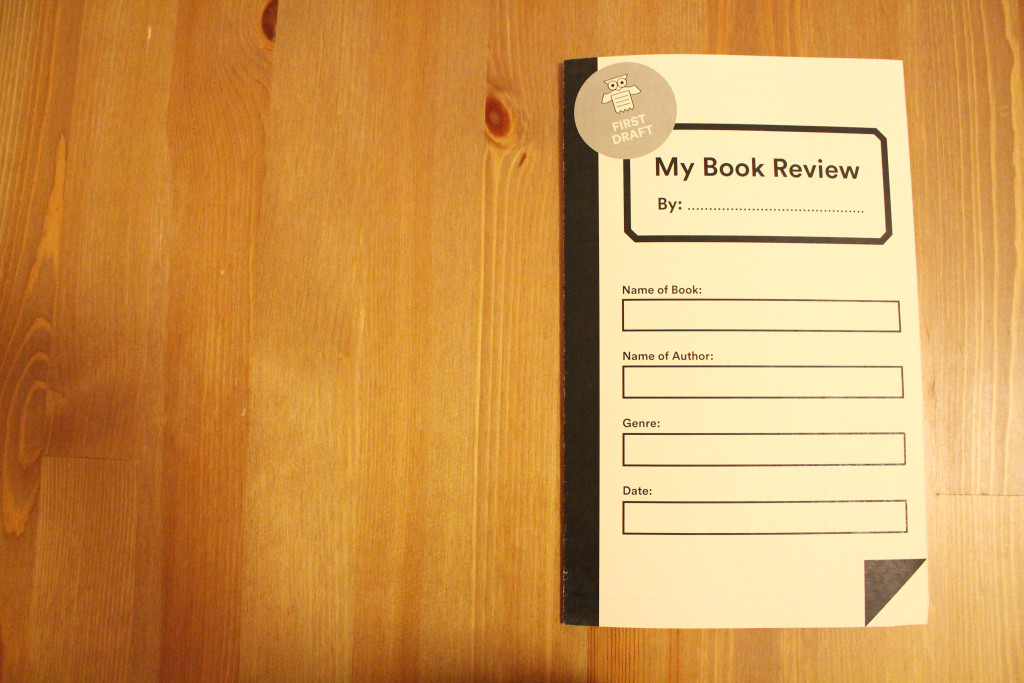
Here’s a look at the layout I designed:

The entire worksheet is an 11 x 17 page, printed and folded along dotted lines. I think it’s important to keep the format a size that teachers can print at school and don’t have to order from a company..

Front Page

This is where the student will write the basic information about the book.
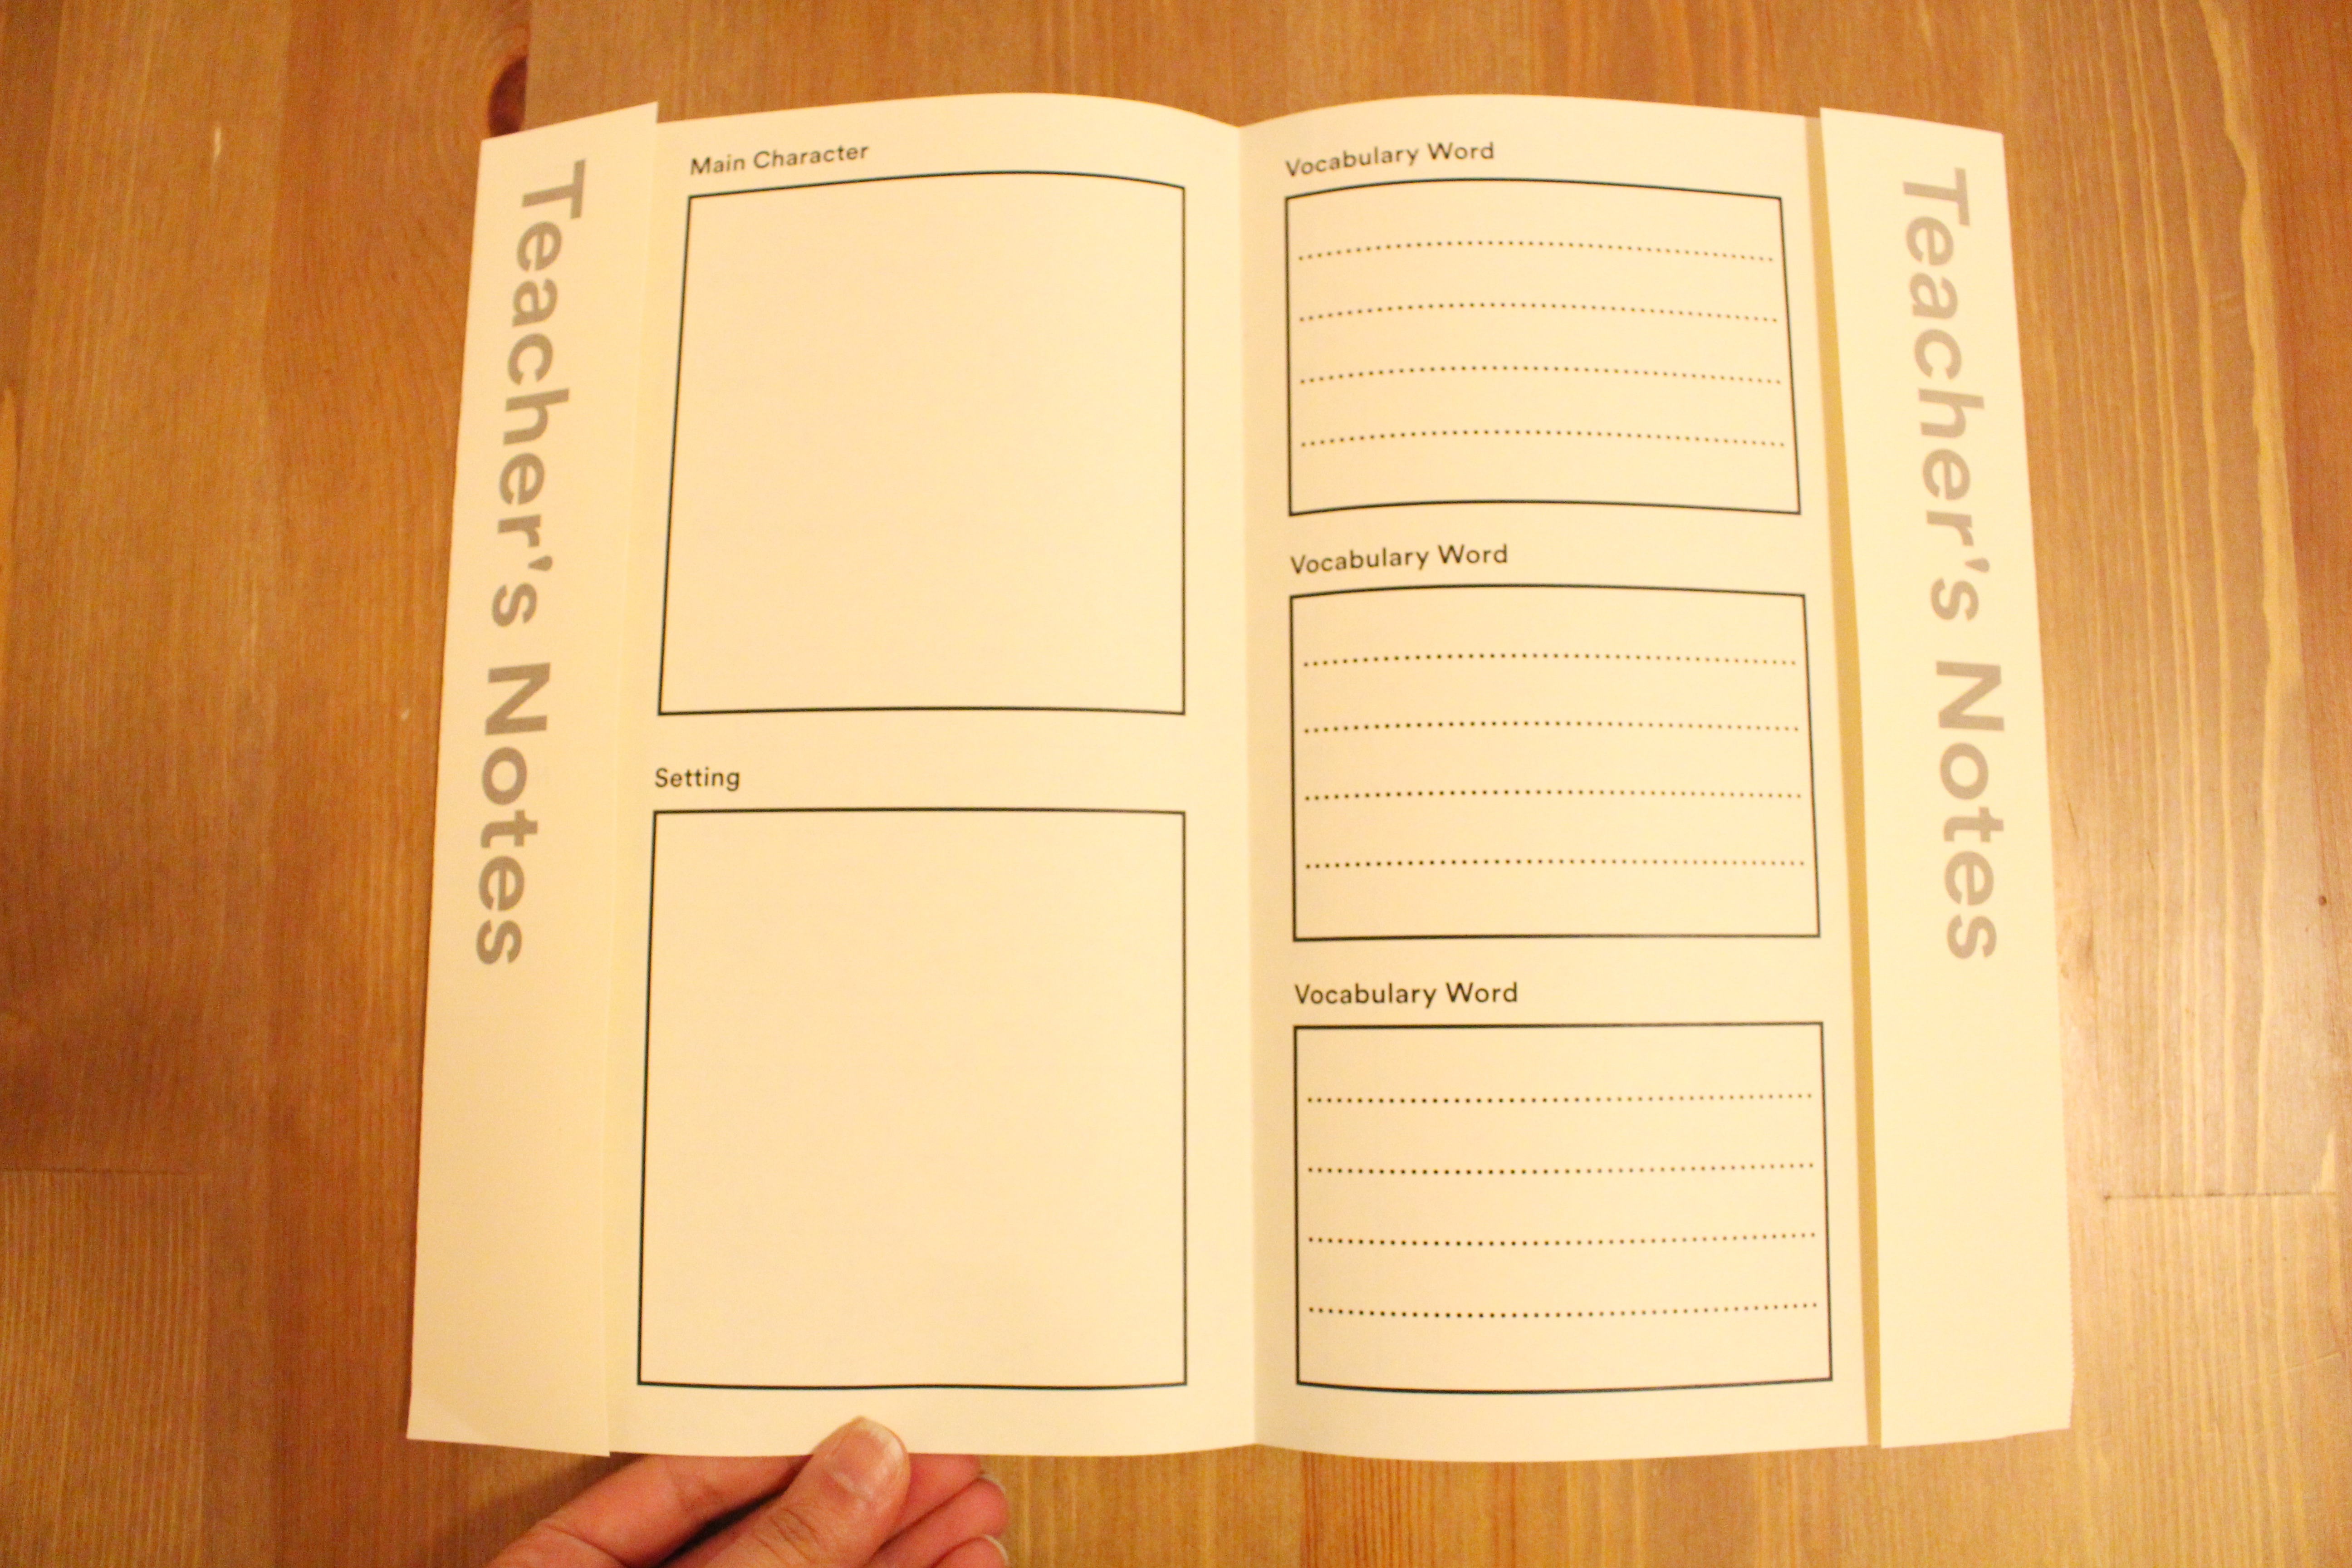
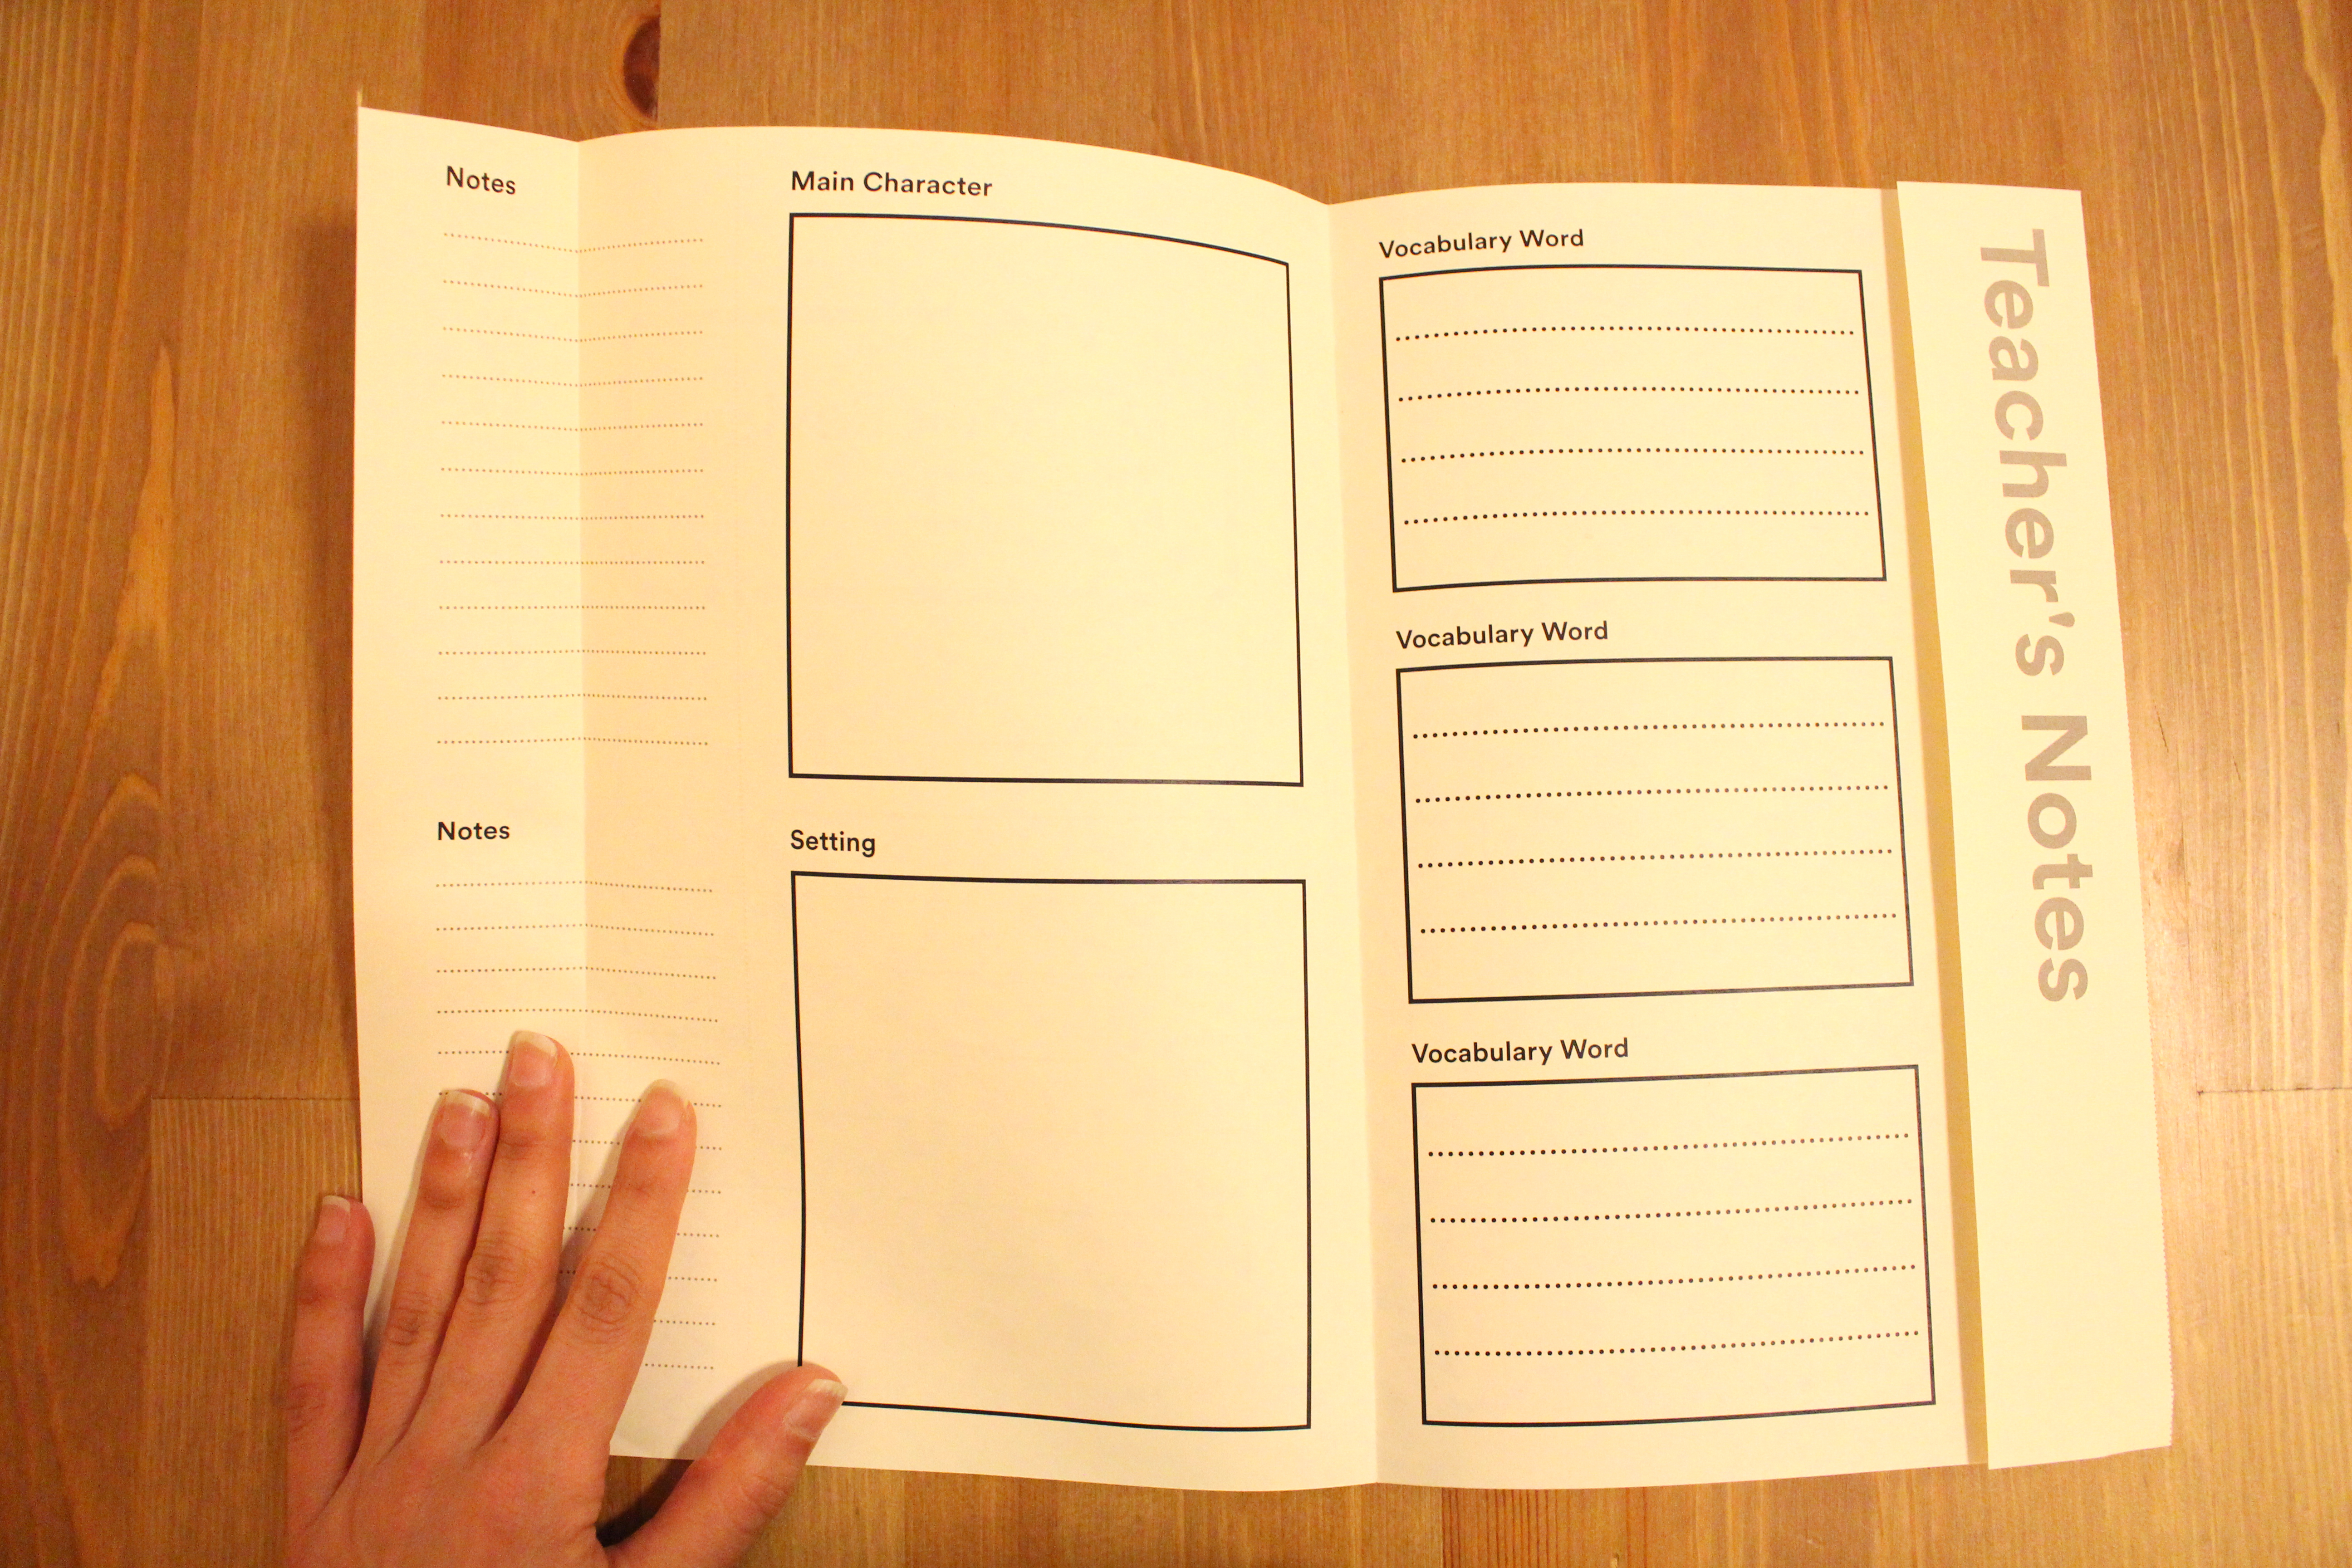
IMG_1703 copy

Open Worksheet

On the first half of the worksheet the student will answer direct but open question addressing the evolvement of the book. The second half asks the student to define new vocabulary words that they learned while reading the book.
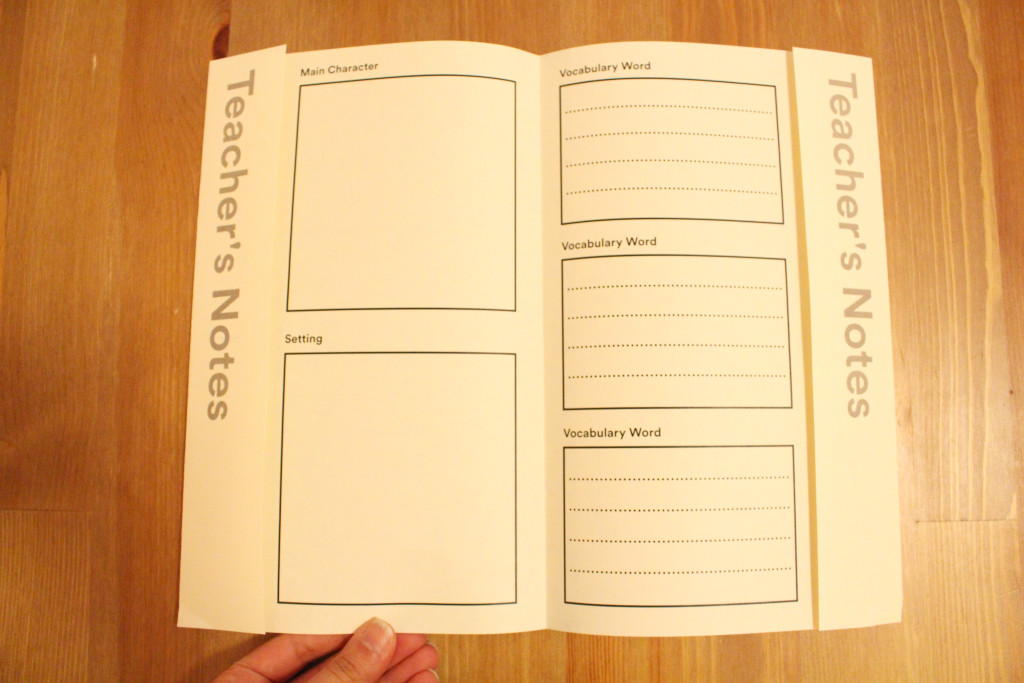
IMG_1704 copy

Teacher’s Notes

I thought it might be interesting to keep the teacher’s note separate from the student’s entry. When I was in school, and especially in elementary school, I remember having teachers that would make comments all over my writing. At times, that style of red-marked comments overriding my writing made me feel discouraged about my work. So, by having the teachers comments not only separate, but hidden away, the student can still see their original work and take pride in it, even wehn there are comments from the teacher.
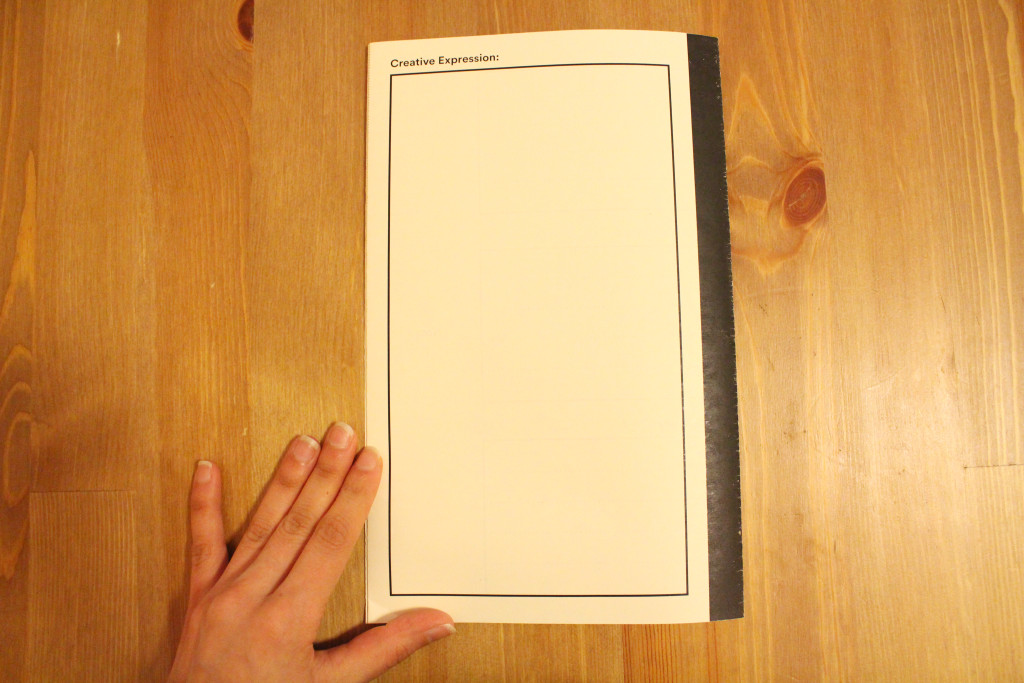
IMG_1706 copy

Creative Expresion

Leaving room for creative interpretation, something a bit less formal, is really important. When I spoke to children in elementary school, their biggest complaint about book reports apart from the actual format, was the lack of creativity. This area of the worksheet allows kids to create a collage of the setting, write a poem, illustrate an alternately cover, or anything else that comes to mind.

IMG_1705 copy

I showed this worksheet to a few teachers and got very positive feedback regarding the idea, They all mentioned that separating the upload process between to two parts, the written and then the digital is a healthy process since it still pushes the student to develop writing and comprehension skills, and once the written version is approved, the student is then introduced to an environment where they develop digital and computer skills.

Next week I will elaborate on the comments I received regarding the content of the worksheet, and how I will move forward with the digital side as well.

The Metal Lathe

comment 1
Subtraction

Now that we’ve become familiar with the wooden lathe, it’s time to get to know the metal lathe. Apparently, this is the most dangerous machine in the shop, yikes!

The material we are stating with is aluminium. In order to spin material on the lathe, we first have to cut a small piece off the long aluminium rod.

fear


The material needs to be secured 1000% in the lathe. Once it’s secured, it’s safe to start facing the material. Facing means taking sheer layers off the material in order to make the surface flat or smooth (the material never comes perfectly smooth from the manufacturer).

2015-04-07 11.43.17

Another important thing to remember on the metal lathe is oil. You have to oil the bits very often since the spinning metal gets very hot very fast and can become dangerous. If there’s no oil, you cannot use the metal lathe.

8007421_orig

After facing the flat side, you can move on to surfacing the rounded side of the material

2015-04-07 11.57.33

Even though facing the material gets the material evenly round, it leaves very thin threads that you are probably going to want to smooth by sanding with sand paper. Before sanding:

2015-04-07 12.14.19


After sanding:

2015-04-07 12.17.07

I’m not sure what to call what I made for my first metal lathe project — metal chapstick?

IMG_8592

My First, Totally Legit, Wooden Bowl

comment 1
Subtraction

If you would have shown me this picture and told me a month ago, actually, even a week ago, that I would make that, I would have never believed you. I kind of still can’t believe I was able to make a real bowl on the lathe, but I can say for a fact that I had the best time and also discovered that I have the bug for this machine.

This is where the process started: I picked up this “scrap” piece of walnut wood from the streets of DUMBO. I cut the corners off in order to make the turning a bit easier, but it was still really difficult.

IMG_8507

So, the making of a wooden bowl (in this case at least) has two main parts. The first part is getting the general shape and bottom side round.

IMG_8509

IMG_8511

IMG_8510


Once that side is done, it’s a good idea to make more room for the chuck to have room to fasten for the next step, so, using a really big drill bit, I carefully carved some more space on the bottom:

inner

IMG_8515


So, once that side is done, it’s time to flip the bowl and secure the bottom to the side of the motor and start carving the inside.

IMG_8525

IMG_8527

shoes

As you can see, carving a bowl makes a HUGE mess! However, slowly but surely, a bowl begins to emerge:

IMG_8529


Once the bowl was finished, I sanded it with 3 types of sandpaper, from roughest to smoothest, and then, while the bowl was still on the lathe, polished and buffed it with tung oil.

And that’s it!

Someone said they would pay me $80 for the bowl, so I may be considering a new career path. 🙂


Turning Ice Cream

comments 2
Subtraction

This week we were given an awesome assignment to make foosball players on the lathe. I (stubbornly) wanted to try something a little different and also experiment with lathe, so I decided to try and make an ice cream player. This “turned” out to be a very long trial-and-error session — it took six spins to get this right!

My initial attempt was to make a cone shape and half a sphere separately, and to connect them together some how at the end. Here are some of the things I tried:

I tried spinning this piece, but learned (the hard way) that the grain of the wood is not in the right direction, which makes it very hard and kind of impossible to turn on the lathe.

broken-wood

I glued colored pencils together and then tried to spin them.. looks nice but unfortunately didn’t turn to ice cream..

IMG_8432

IMG_8434

IMG_8440

IMG_8467

..and another attempt that didn’t work because it was too chubby..

IMG_8429

Here’s a quick glimpse at my best mistakes:

icecream-mistakes


You can imagine that by the fifth time around I was pretty bummed out and thought I would never get an ice cream piece on the foosball table. This is when I got serious and made sure this time would be the winning time.

embrace

… and after some turning and good luck…

IMG_8468

We have ice cream! I decided to paint the top (strawberry, of course), and then on to the foosball table!

IMG_8474

IMG_8488

P.S. – The ice cream is the last surviving player on the foosball table! Yes!

The Lathe

comment 1
Subtraction

A few weeks ago we were introduced to the lathe. This is a completely new tool to me, and honestly, when Ben first demonstrated how it works, I was a bit terrified. What the lathe does is spin material (wood in our case) at a very high speed, while the crafter removes material away with tools very carefully. Here’s what it looks like.

Our assignment was to build a handle based on measurements. Here’s the sketch I made as a blueprint:

IMG_8608

So, after securing the material on the lathe (and having the courage to turn in on), I began to remove material with the tools.

terrified

Here’s what the material looked like after I got it round and marked key spots for reference.

Photo Mar 19, 12 53 38 PM

I’m not sure how to explain this process in technical terms since I just did what I felt was right, but if I attempt to explain — while the material was spinning I slowly began to remove material in certain areas, until this happened:

Photo Mar 19, 1 19 00 PM

Although I did this just to get a feel for the lathe, I think I might make another handle identical to this one and then have handles for a jumprope!

il_570xN.554835815_4mx8


Closest to Rome

Leave a comment
Mapping and Data Viz for the Ancient World

This week we were asked to map the closest cities and amphiteaters to Rome according to expenses in our dataset.

I started working on this, and understand everything up to the point I’m up to. In other words, I understand that in order to create a map of this specific data I need to subset information from the larger dataset, however, it’s not very clear to me how to make the actual map. Here’s a link to what I’ve done on Github.


Plotting Networks

Leave a comment
Mapping and Data Viz for the Ancient World

This week I tried playing around with the igraph package in R. This package helps “connect the dots” between nodes and edges — or in other words, a specific point and a path connecting between two points.

I have to admit that I did not enjoy using this package as it is not intuitive or documented very well. With the help of the Stack Overflow forum, I was able to create the plot above . However, I’m still having trouble adjusting the font size so that the plot is readable. You can view my markdown on Github since RPubs did not draw my plot.